Creating Cases
Cases represent individual medical procedures or patient encounters that you've performed during your clinical rotations. You can create new cases from two convenient locations in Core Tracker.
Where to Create Cases
1. Dashboard Quick Actions
From the main Dashboard:
- Navigate to Dashboard: Go to your main dashboard page
- Find Quick Actions: Look for the "Quick Actions" section
- Click New Case: Click the "New Case" button with the blue briefcase icon
- Fill Out Form: Complete the case creation form
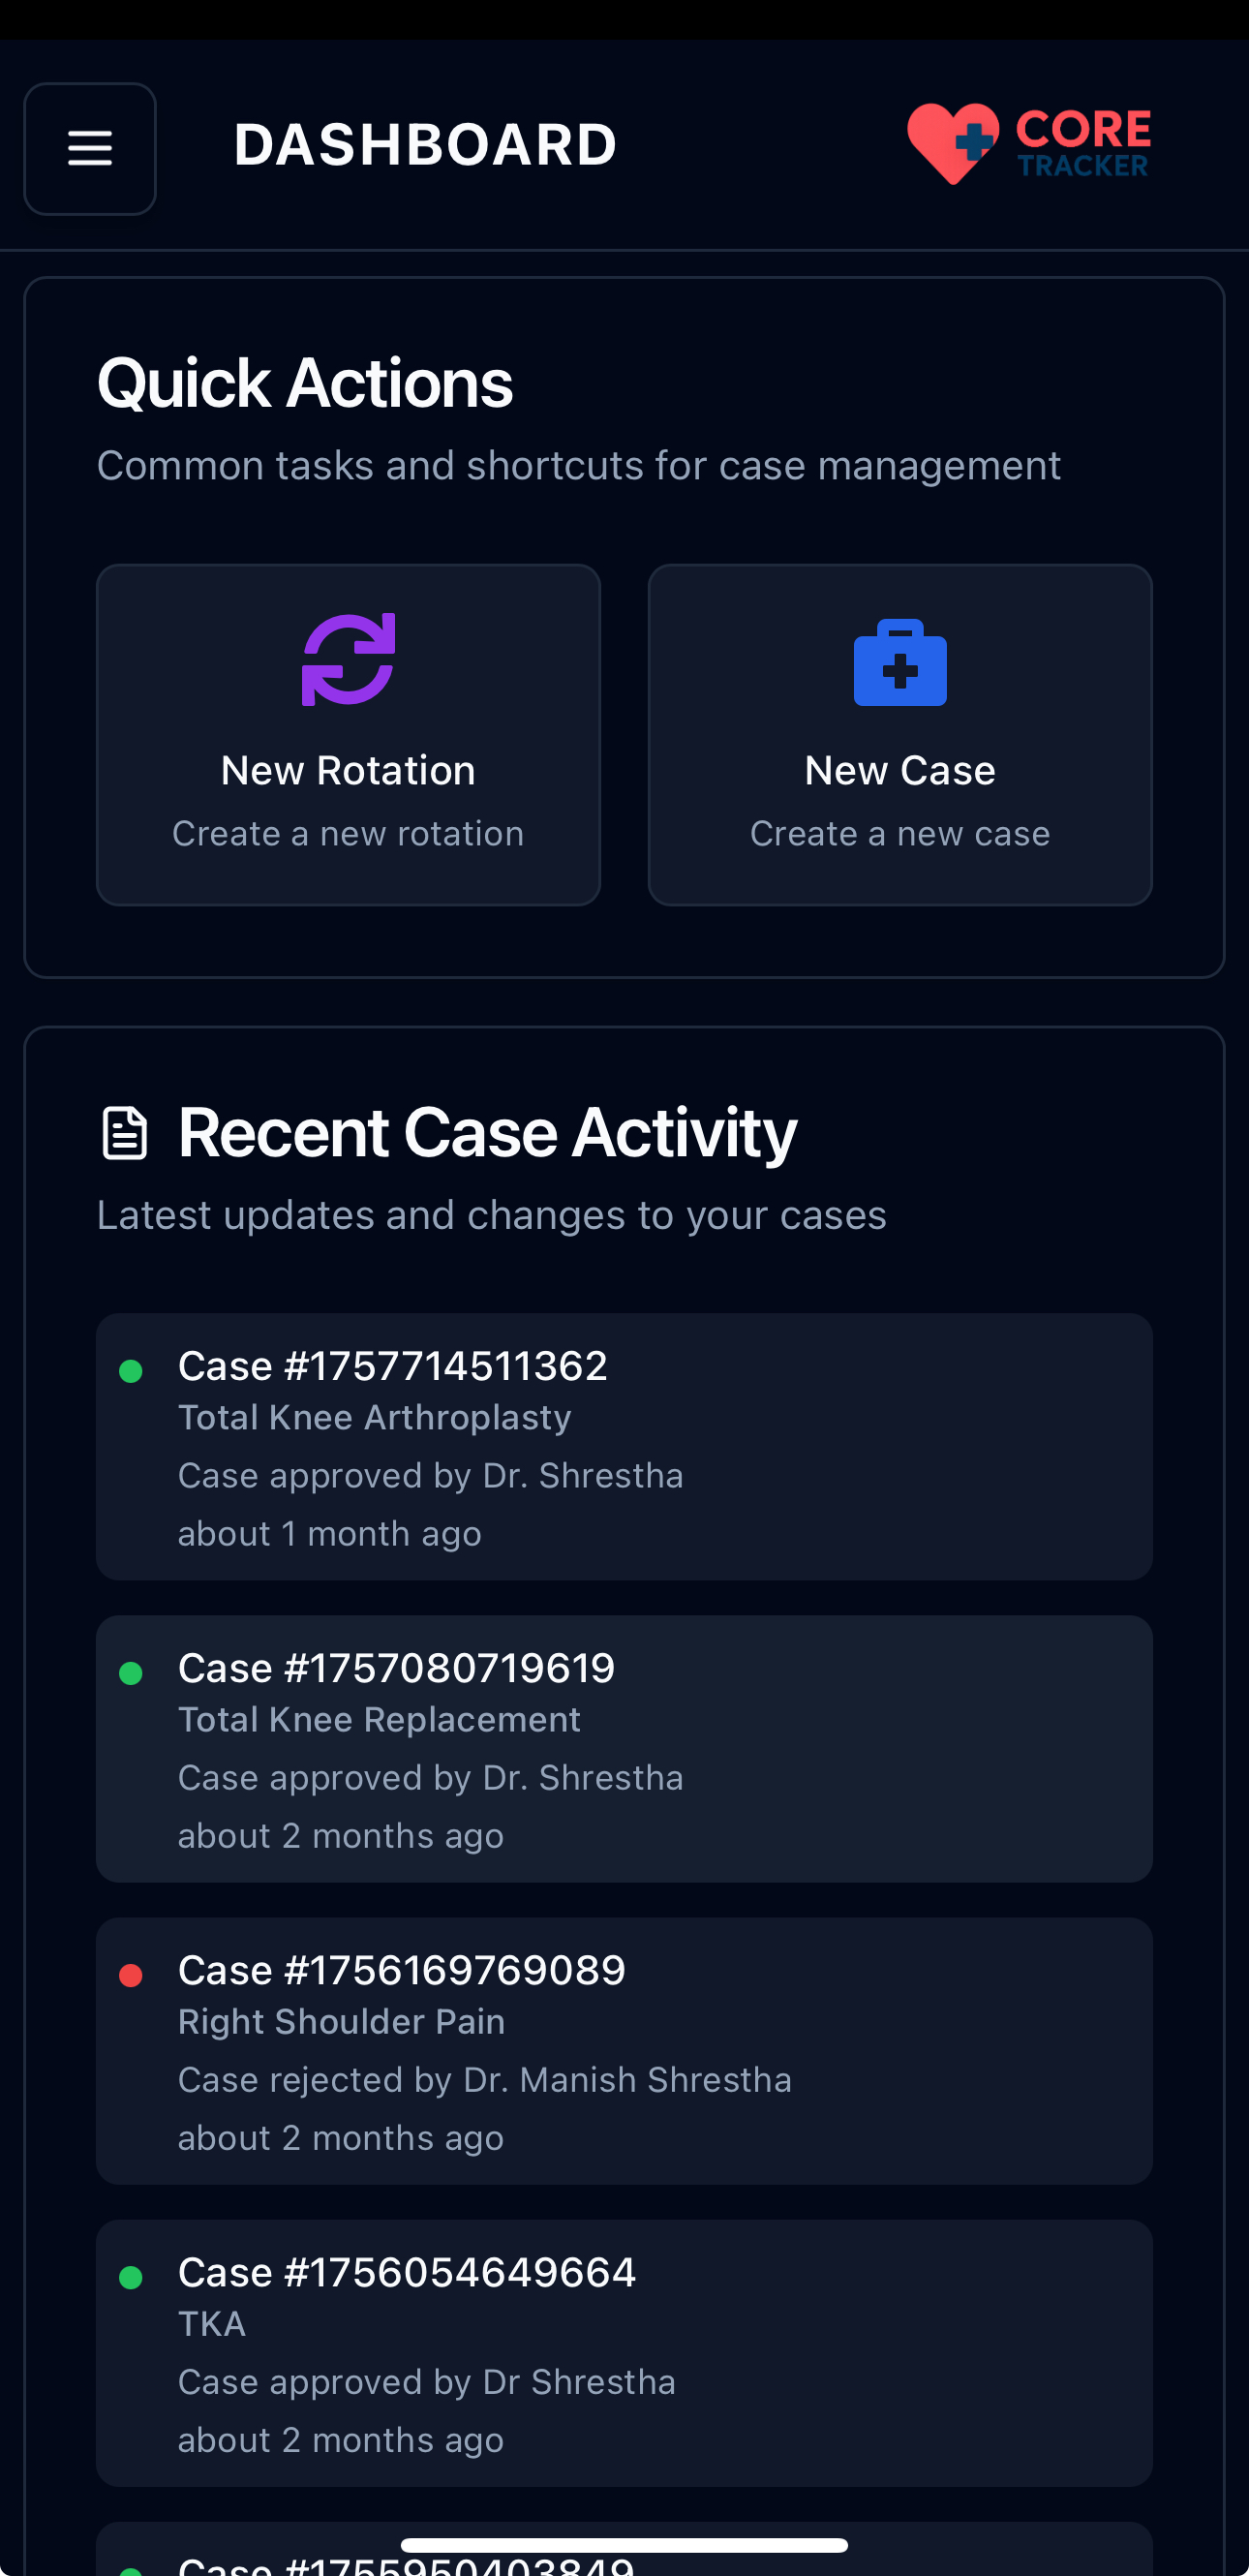
Quick Actions section on the Dashboard
2. Cases Page
From the dedicated Cases page:
- Navigate to Cases: Go to the Cases page from the main navigation
- Find Add Button: Look for the plus (+) icon button in the top-right corner
- Click Add Case: Click the plus button to open the case form
- Fill Out Form: Complete the case creation form

Add Case button on the Cases page
Filtering Cases
The Cases page includes filter buttons to help you organize your cases by status:
- All (Blue): Shows all cases regardless of status
- Open (Gray): Shows cases that are still being worked on
- Pending (Yellow): Shows cases that have been sent for sign-off (students only)
- Approved/Completed (Green): Shows cases that have been approved or completed
- Rejected (Red): Shows cases that were rejected (students only)
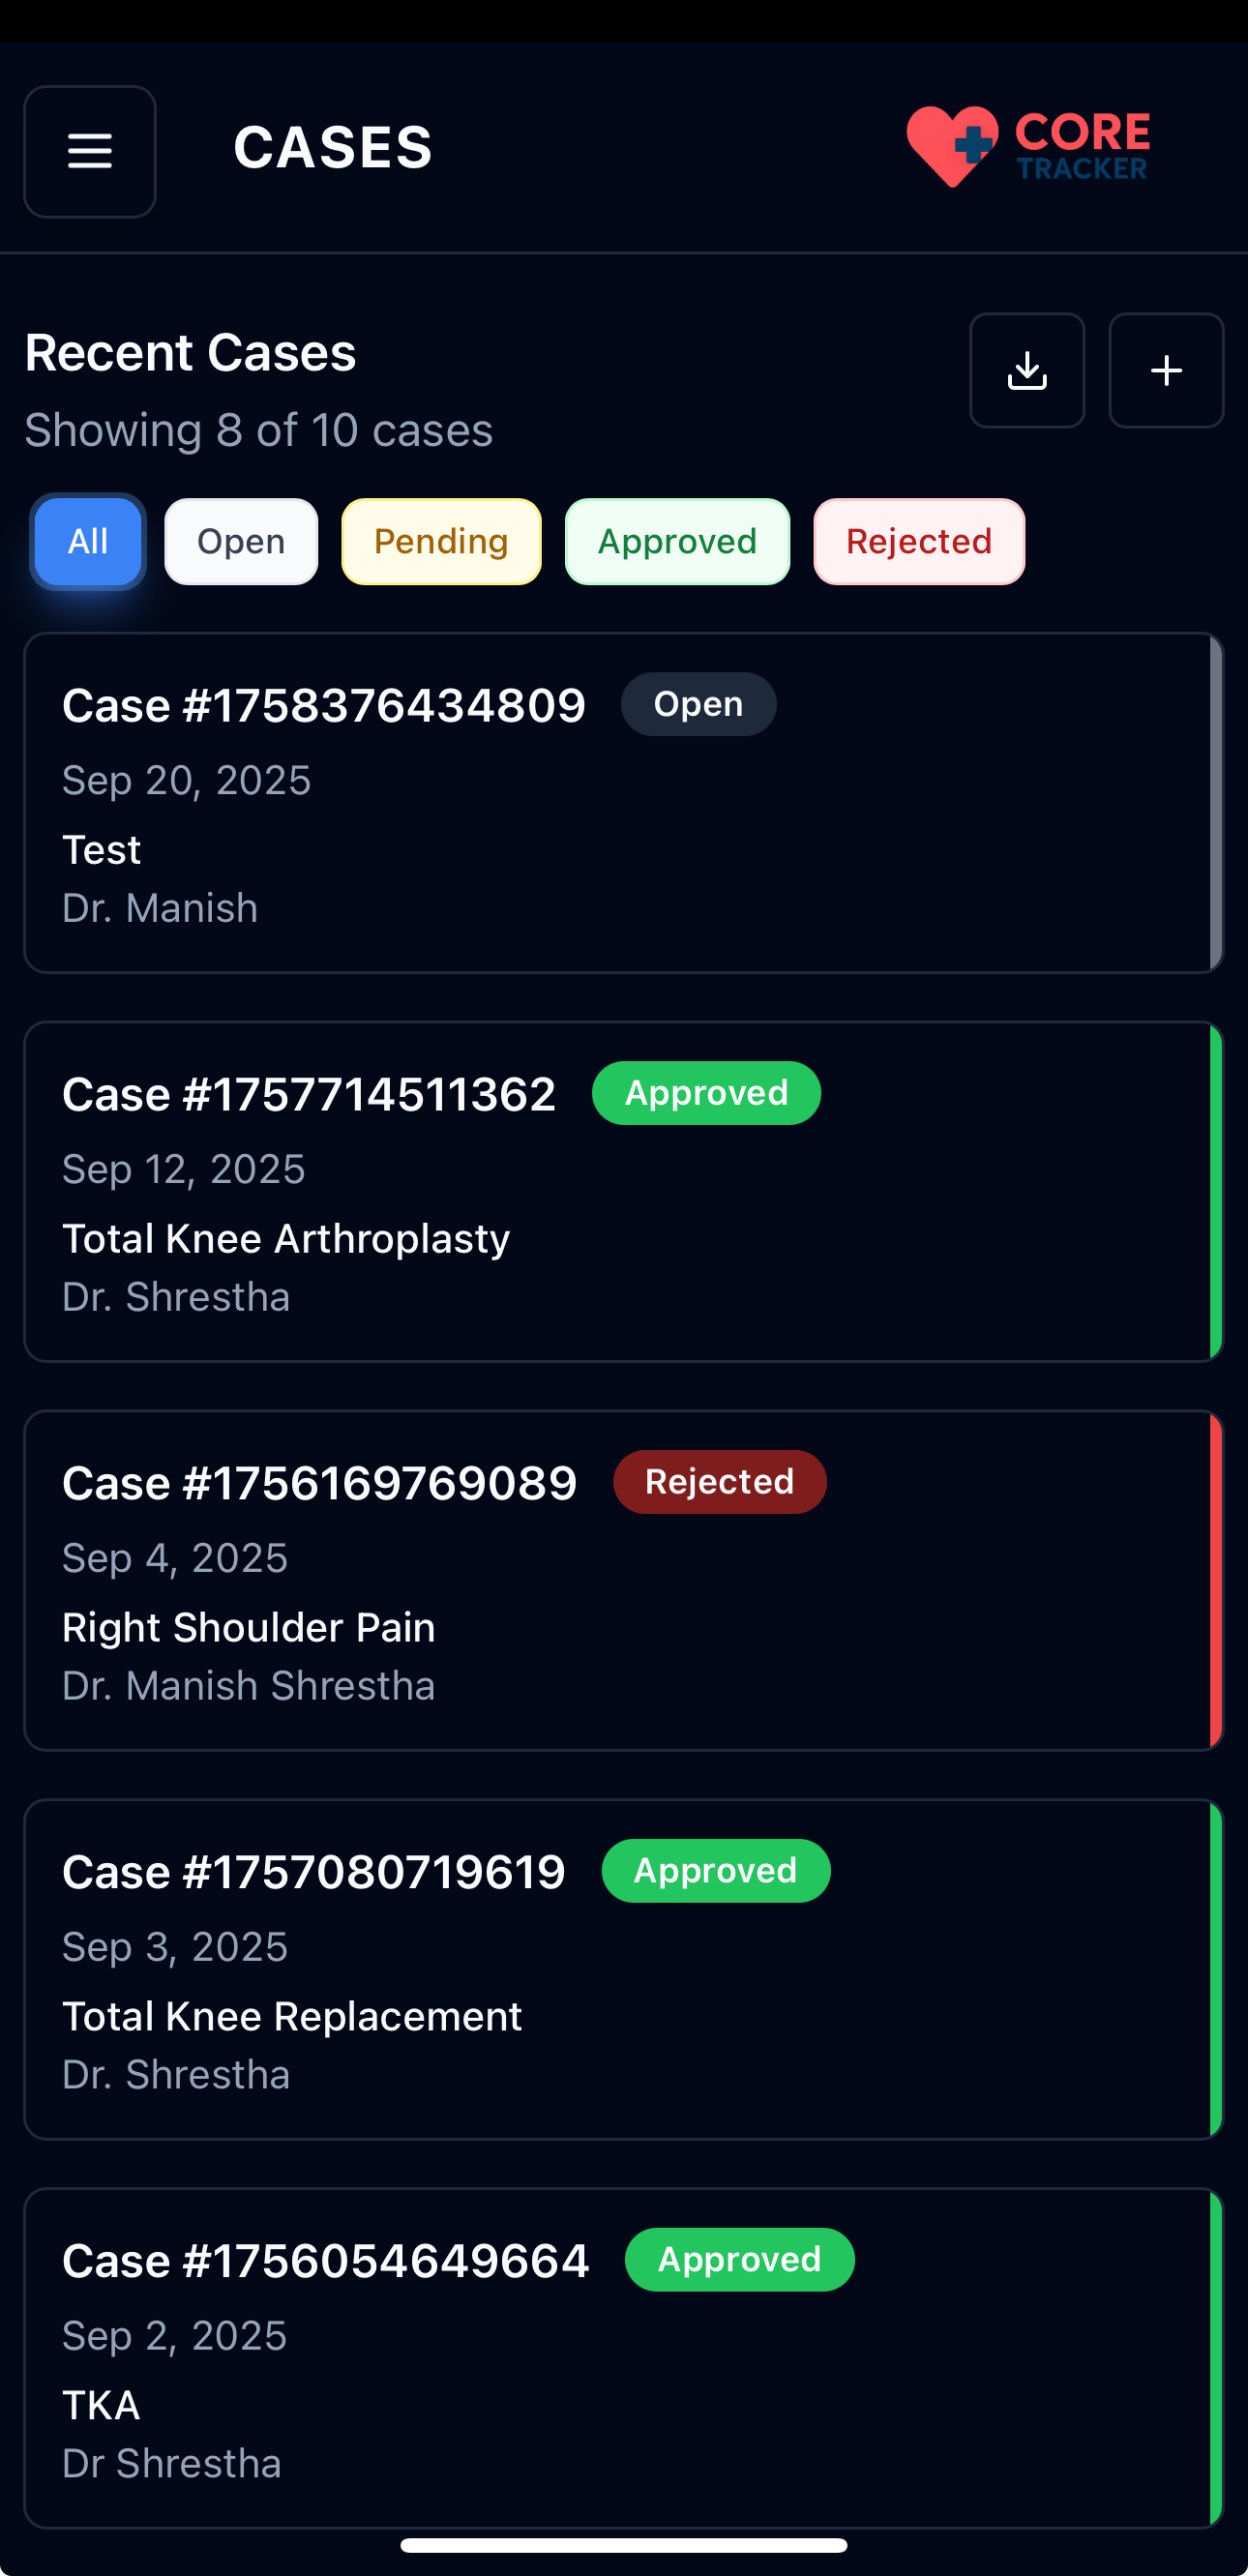
Filter buttons for All, Open, Pending, Approved, and Rejected cases
To use the filters: 1. Click Filter Button: Click any of the filter buttons (All, Open, Pending, Approved, Rejected) 2. View Filtered Results: The case list will update to show only cases matching that status 3. Active Filter: The selected filter will be highlighted with a colored background 4. Clear Filter: Click "All" to see all cases again
What You See
Students see "Pending" and "Rejected" options, while Residents, Attending Physicians, and other roles see "Completed" instead of "Approved".
Case Creation Form
When you click either "New Case" button, you'll see a form with the following required fields:
Required Information
- Rotation: Select which rotation this case belongs to
- Choose from your list of rotations
- Shows the hospital name and dates
-
Pick the rotation where you did this procedure
-
Service Date: Choose the date when the procedure was performed
- Tap the calendar to pick the date
- The date must be within your rotation period
-
Today's date is selected by default
-
Procedure: Enter a description of the medical procedure
- Type what procedure you performed
-
This field is required
-
Attending Physician: Enter the name of the supervising physician
- Type the name of your supervising doctor
- Note: If you are an Attending Physician, this field will be filled in automatically with your name
Important Notes
- All fields are required to create a case
- The service date must be within your rotation dates
- Make sure to select the correct rotation from your list
Creating the Case
- Fill Out All Fields: Complete the rotation, service date, procedure, and attending physician
- Click Continue: Click "Continue" to proceed to confirmation
- Review Information: Review the case details in the confirmation screen
- Confirm Creation: Click "Create Case" to save your case
- Success: You'll see a success message when the case is created
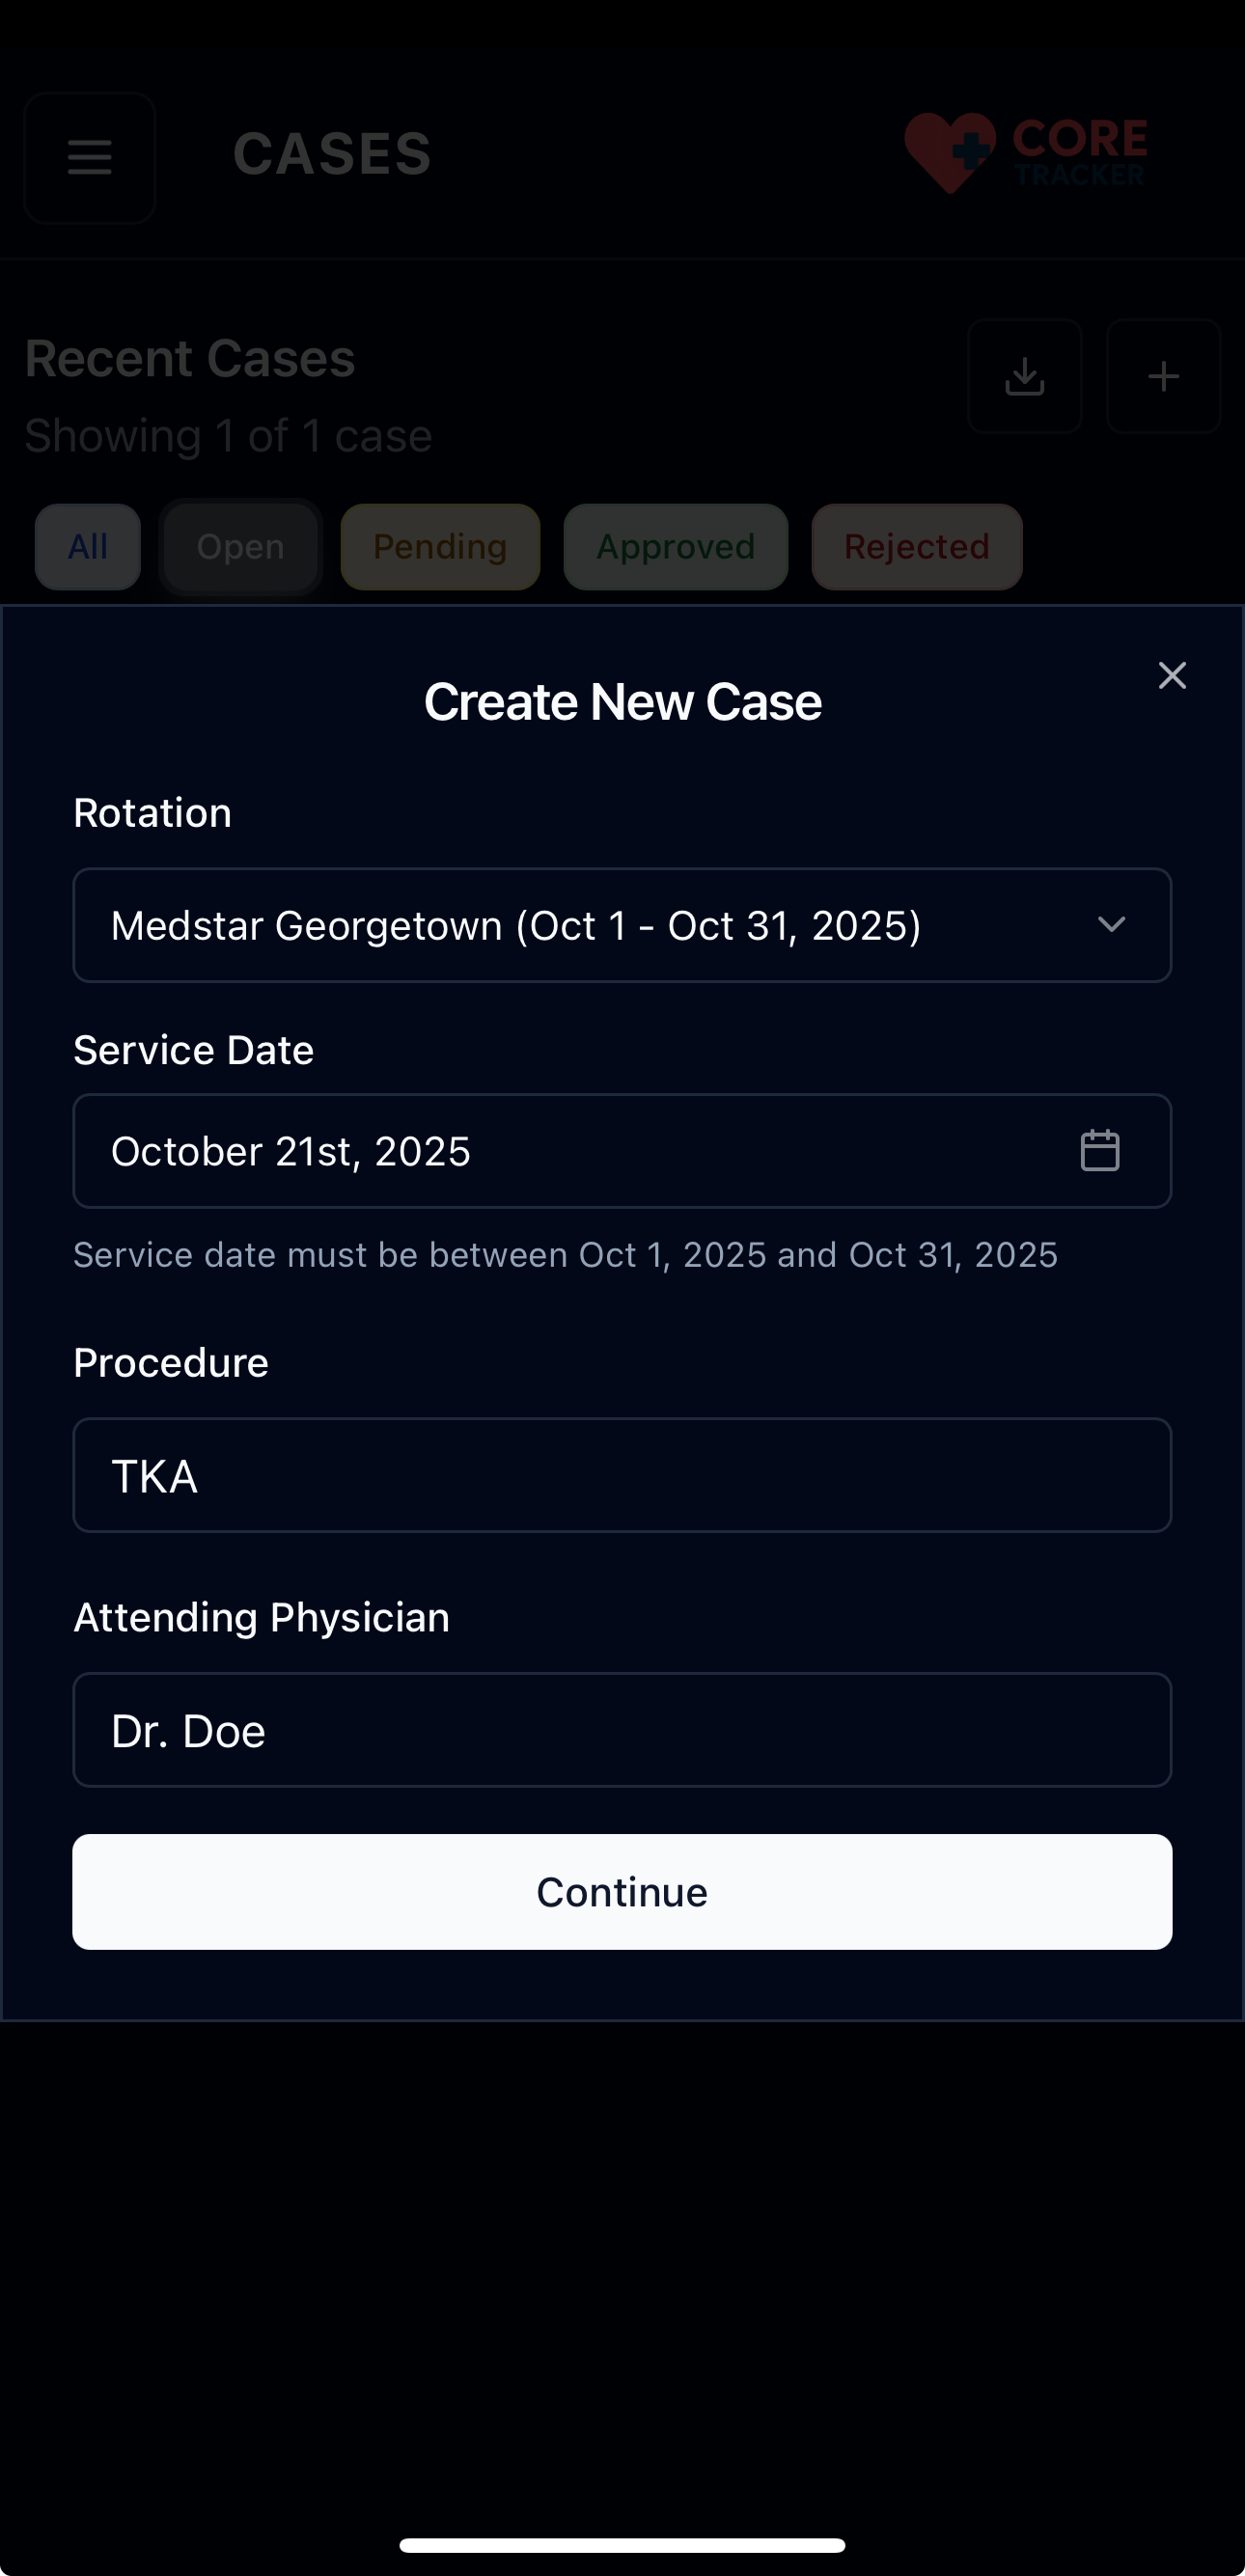
Case creation form with required fields
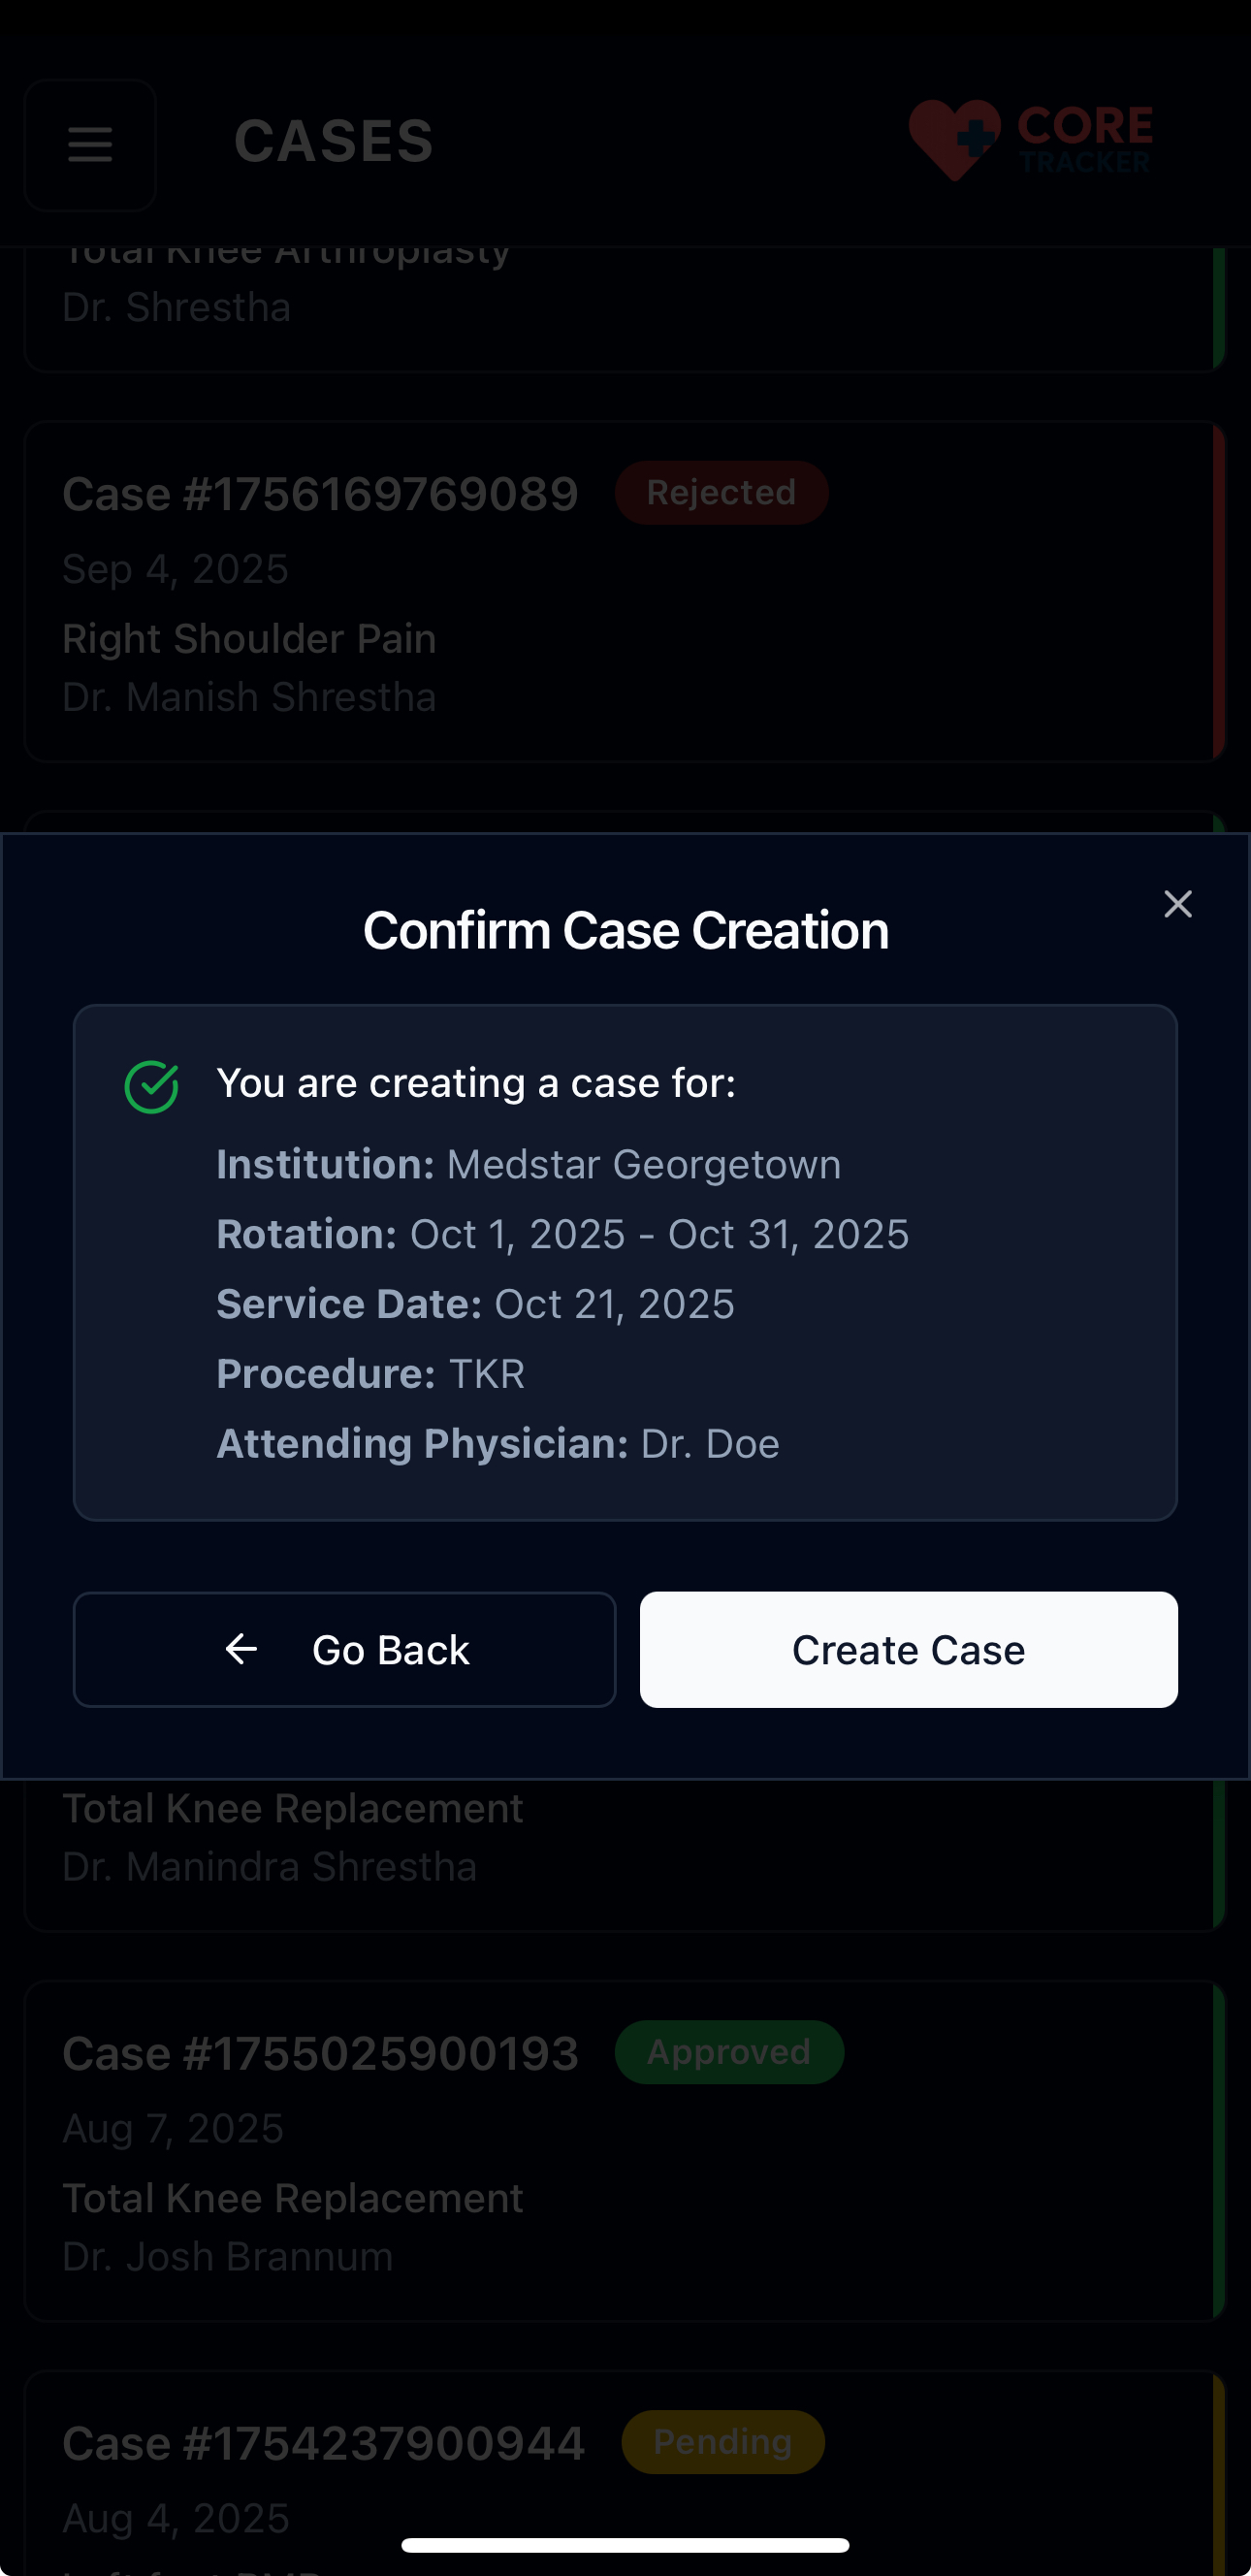
Case confirmation screen showing all details
After Creating a Case
Once your case is created:
- Dashboard Update: The case will appear in your dashboard statistics
- Cases List: It will show up in your Recent Cases list
- Case Details: You can view and edit the full case details
- Patient Details: Add patient information manually or scan patient stickers
- Sign-off Process: Cases can be sent for approval (for students)
Patient Details and Sticker Scanning
Adding Patient Information
Each case requires patient details, which can be added in two ways:
- Manual Entry: Type patient information directly into the Patient Details text area
- Scan Patient Sticker: Use the camera to scan patient stickers and automatically extract information
Scan Sticker Feature
The scan sticker feature makes it easier to input patient information:
- Open Case Details: Go to your case and click on it to view details
- Find Patient Details Section: Look for the "Patient Details" section
- Click Scan Sticker: Click the "Scan Sticker" button with the camera icon
- Allow Camera Permission: Grant camera access when prompted
- Point Camera at Sticker: Position the camera over the patient sticker
- Take Photo: Tap the capture button to take a picture
- Auto-Populate: The system will extract text and populate the Patient Details field

Scan Sticker button in Patient Details section

Camera permission request for scanning
Camera Permission
To use the scan sticker feature:
- Allow Camera Access: When prompted, tap "Allow" to let the app use your camera
- Works Best on Mobile: The scanning works best on phones and tablets
Camera Permission
If you accidentally deny camera access, you can manually enter patient information instead. You can also refresh the page and allow camera access when prompted again.
Manual Entry Alternative
If you prefer not to use the camera or if scanning fails:
- Click in Patient Details Field: Click on the "Patient Details" text area
- Type Information: Manually type patient information
- Include All Details: Add patient name, ID, date of birth, and other relevant information
- Save Changes: Click "Save" to store the information
Managing Existing Cases
Viewing and Editing Cases
Both viewing and editing cases use the same case details page:
- Go to Cases Page: Navigate to the Cases section
- Find Your Case: Locate the case you want to view or edit
- Click on Case: Click on the case card to open the case details page
- View Information: See all case details, patient information, and notes
- Make Changes (if needed): Update the procedure, notes, or other details
- Save Changes: Click "Save" to update the case
Deleting Cases
- Go to Cases Page: Navigate to the Cases section
- Find Your Case: Locate the case you want to delete
- Swipe Left: Swipe left on the case card to reveal delete option
- Confirm Deletion: Click the delete button to confirm
Deleting Cases
You cannot delete cases that have been sent for sign-off or already signed off. The system will prevent deletion and show an error message.
Case Status and Workflow
Case Statuses
Cases can have different statuses:
- Open: Newly created cases that are still being worked on
- Sent for Sign-off: Cases that have been submitted for approval (students only)
- Signed Off: Cases that have been approved by the attending physician
- Completed: Cases that are fully processed
Sign-off Process (Students)
For students, cases go through an approval process:
- Create Case: Create and fill out your case details
- Complete Required Fields: Ensure all required fields are filled:
- Procedure description
- Attending physician
- Patient details (scan text)
- Case type (if applicable)
- Send for Sign-off: Submit the case to your attending physician for approval
- Await Approval: Wait for the attending physician to review and approve
- Receive Feedback: Get notified when the case is approved or needs changes
Sending Cases for Sign-off
To send a case for sign-off:
- Open Case Details: Click on your case to view the full details
- Complete All Fields: Make sure all required information is filled out
- Find Sign-off Button: Look for the "Request Sign Off" button with a send icon
- Enter Supervisor Email: Enter your supervisor's email address
- Submit for Approval: Click "Send for Sign Off" to submit the case

Request Sign Off button and supervisor email dialog
Before Sending for Sign-off
Make sure all information is filled out and saved before you can send the case for approval.
Exporting Cases
Core Tracker provides two ways to export your cases:
Export Individual Case (PDF)
To export a single case as a PDF:
- Open Case Details: Click on the case you want to export
- Find Export Button: Look for the "Download" button with a download icon in the top-right corner
- Click Export: Click the download button to generate and download the PDF
- Save PDF: The PDF will be automatically downloaded to your device

Download button for individual case PDF export
Export All Cases (Excel)
To export all your cases as an Excel file:
- Go to Cases Page: Navigate to the Cases page from the main navigation
- Find Export Button: Look for the "Export Cases" button with a download icon in the top-right corner
- Click Export: Click the export button to open the export dialog
- Select Date Range: Choose the start and end dates for the cases you want to export
- Generate Excel File: Click "Export" to generate and download the Excel file with all cases in the selected date range

Export Cases button and date range selection dialog
What's Included in Exports
Individual Case PDF: - Complete case information in a professional medical format - All patient details, procedures, and notes - Ready for medical records and documentation
Excel Export (All Cases): - All your cases in a spreadsheet format - Organized by columns for easy viewing - Perfect for sharing with supervisors or keeping records
Role-Based Differences
Students
- Can create cases for any rotation they're assigned to
- Must specify an attending physician for each case
- Cases must be sent for sign-off to supervisors
- Cannot delete cases that have been sent for sign-off
- See "Pending" and "Rejected" case filters
- Must fill out all case details including Case Type
Residents
- Can create cases for any rotation
- Must specify an attending physician for each case
- See "Completed" instead of "Approved" in filters
- Can set and track goals
- Must fill out all case details including Case Type
Attending Physicians
- Can create cases for any rotation
- Attending physician field is automatically populated with their name
- Case Type field is hidden - they don't need to fill it out
- See "Completed" instead of "Approved" in filters
- Have full access to edit and manage cases
Other Roles (Nurse Practitioners, Physician Assistants, Certified Surgical Assistants, Registered Nurse First Assist)
- Can create cases for any rotation
- Must specify an attending physician for each case
- See "Completed" instead of "Approved" in filters
- Can set and track goals
- Must fill out all case details including Case Type
Tips for Creating Cases
- Accurate Dates: Use the exact date when the procedure was performed
- Clear Descriptions: Write clear, detailed procedure descriptions
- Correct Rotation: Make sure to select the right rotation
- Complete Information: Fill out all required fields completely
Troubleshooting
Can't Find Your Rotation?
If you don't see your rotation in the dropdown: - Make sure you've created the rotation first - Check that the rotation dates are correct - Verify you're assigned to that rotation
Date Issues
If you're having trouble with service dates: - Make sure the service date falls within the rotation's date range - Check that you've selected a rotation first - Verify the rotation dates are correct
Form Not Submitting
If the form won't submit: - Check that all required fields are filled out - Verify the service date is within the rotation date range - Make sure you've selected a rotation - Try refreshing the page and filling out the form again
Next Steps
After creating your case:
- View and Edit Cases - Click on any case to open the case details page where you can view all information and make edits
- Send for Sign-off - Submit cases for approval (students)
- Export Cases - Download your cases as PDF or Excel files
- Explore the Dashboard - Monitor your case progress
- Set Goals - Track your progress with billing code and case count goals